

Actions
Overview
What are Actions?
An Action is a user-triggered operation backed by a workflow. It appears as a button in a search view or home view and can collect input from the user before running the workflow.
Actions are not tied to a selected entity record. If an operation must run from an edit view or use one or more selected records, use an Entity Action instead.
An Action passes each value collected in the interface to the main method of its associated workflow:
The input's Argument Name identifies the workflow parameter that receives its value. The names must match, and the configured input type must be compatible with the parameter type.
Tutorial: Create your first Action
In this tutorial, you will create a Show Greeting Action. It asks the user for a name, passes that name to a workflow, and displays Hello, Alex as a validation message when the user enters Alex.
Before you begin, make sure you can create Actions, workflows, and search views in the Develop app.
Create the Action
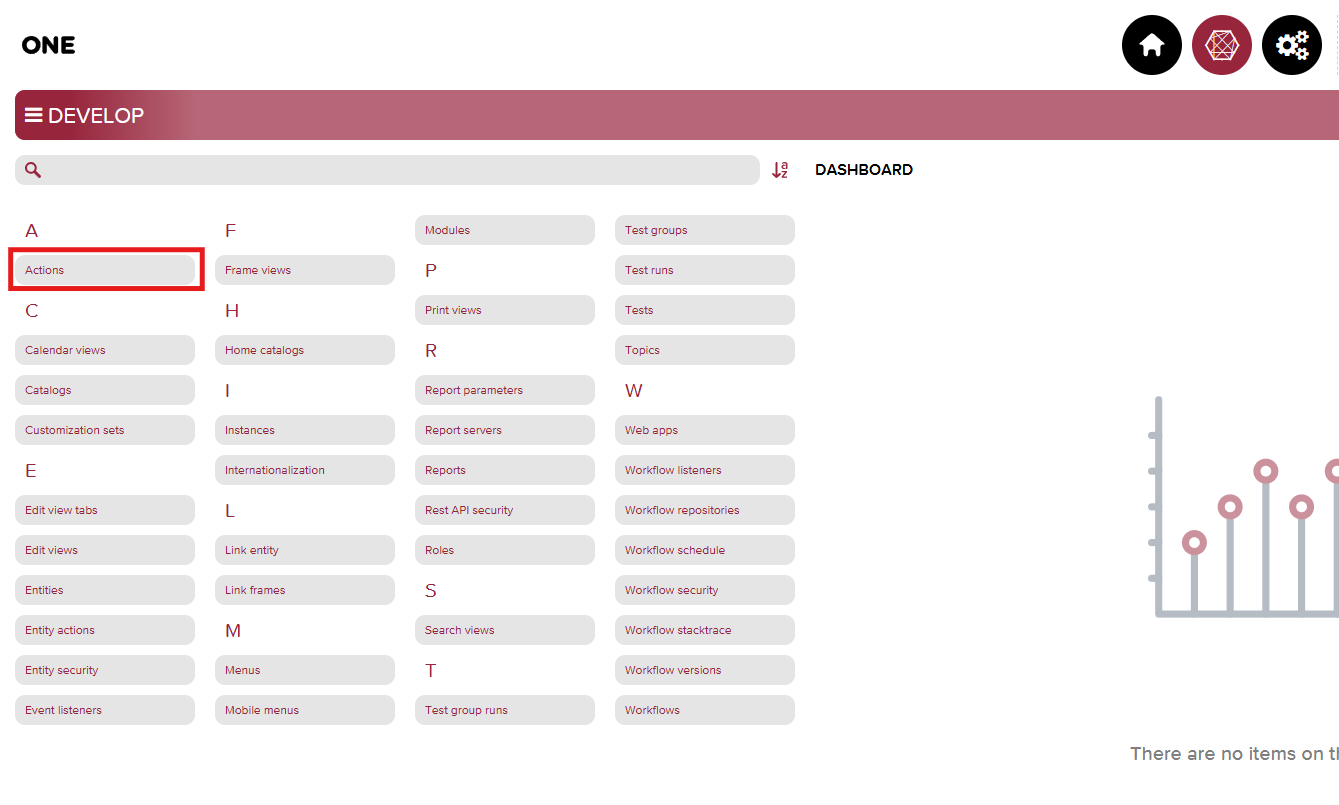
In the Develop app, open the main menu and select Actions.
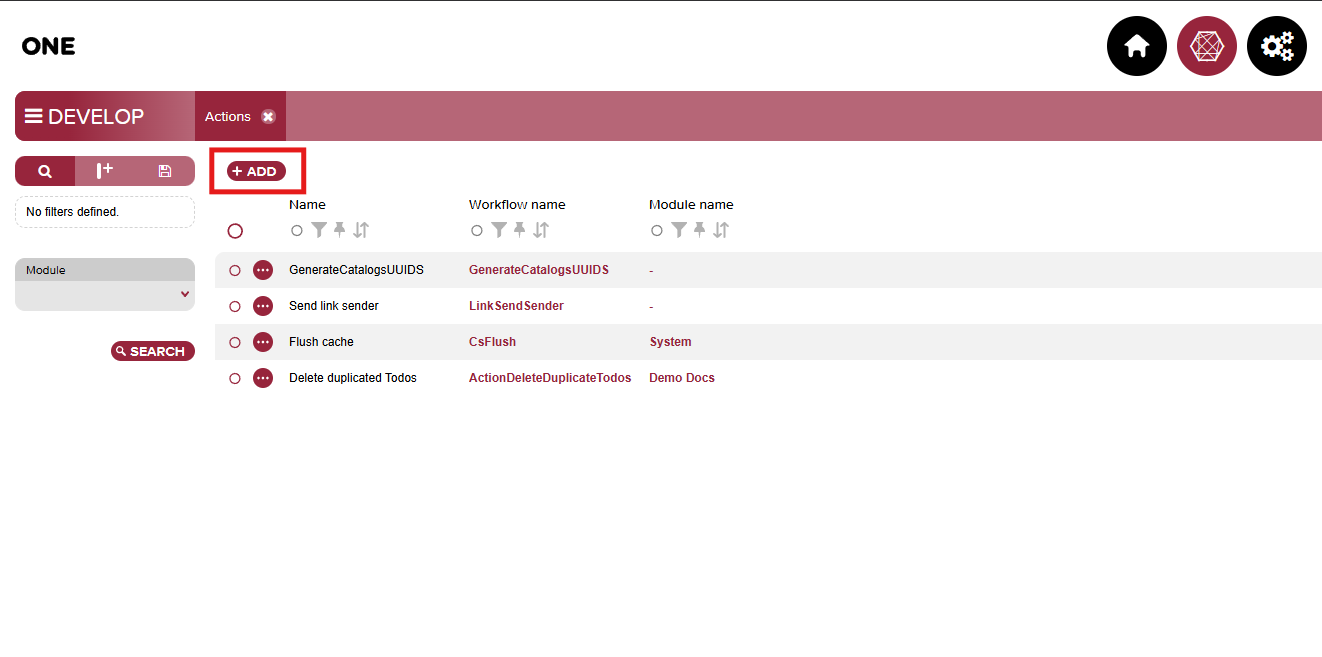
On the Actions page, click Add.
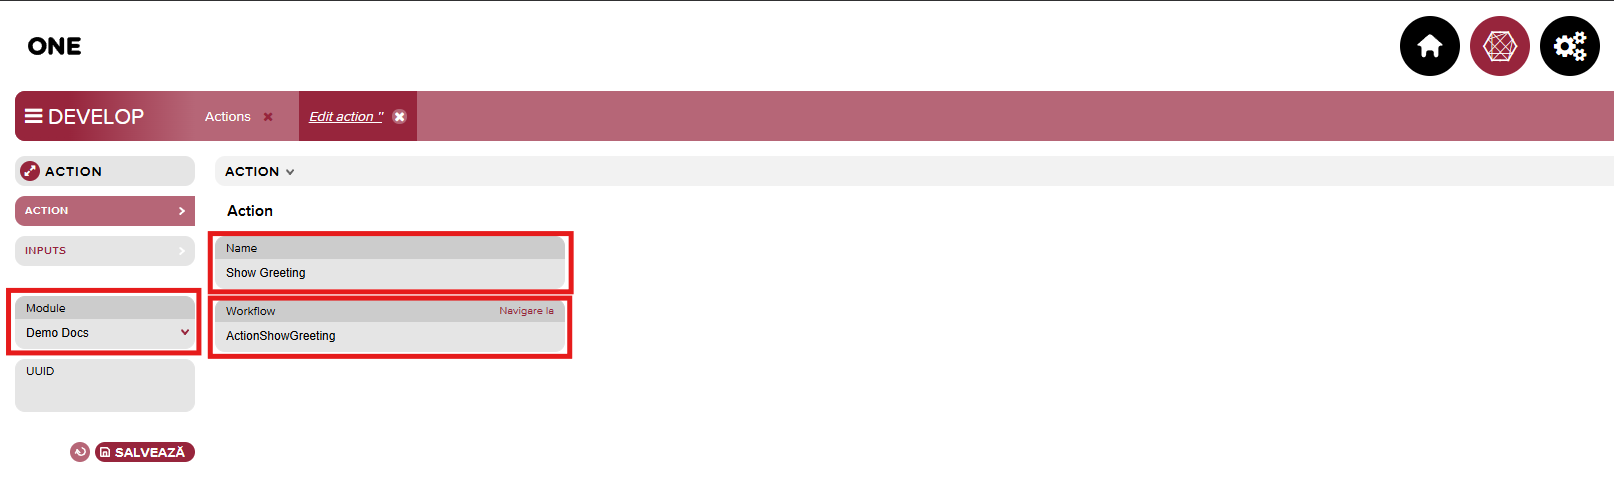
Set Name to Show Greeting.
If the Action belongs to a module, select it in the Module field.
Add the input
Open the INPUTS tab, click Add, and configure the input:
| Field | Value |
|---|---|
| Title | Name |
| Argument Name | name |
| Input type | String |
| Catalog | Leave empty |
| Default value | Leave empty |
| Is Optional | No |
| Rank | 0 |
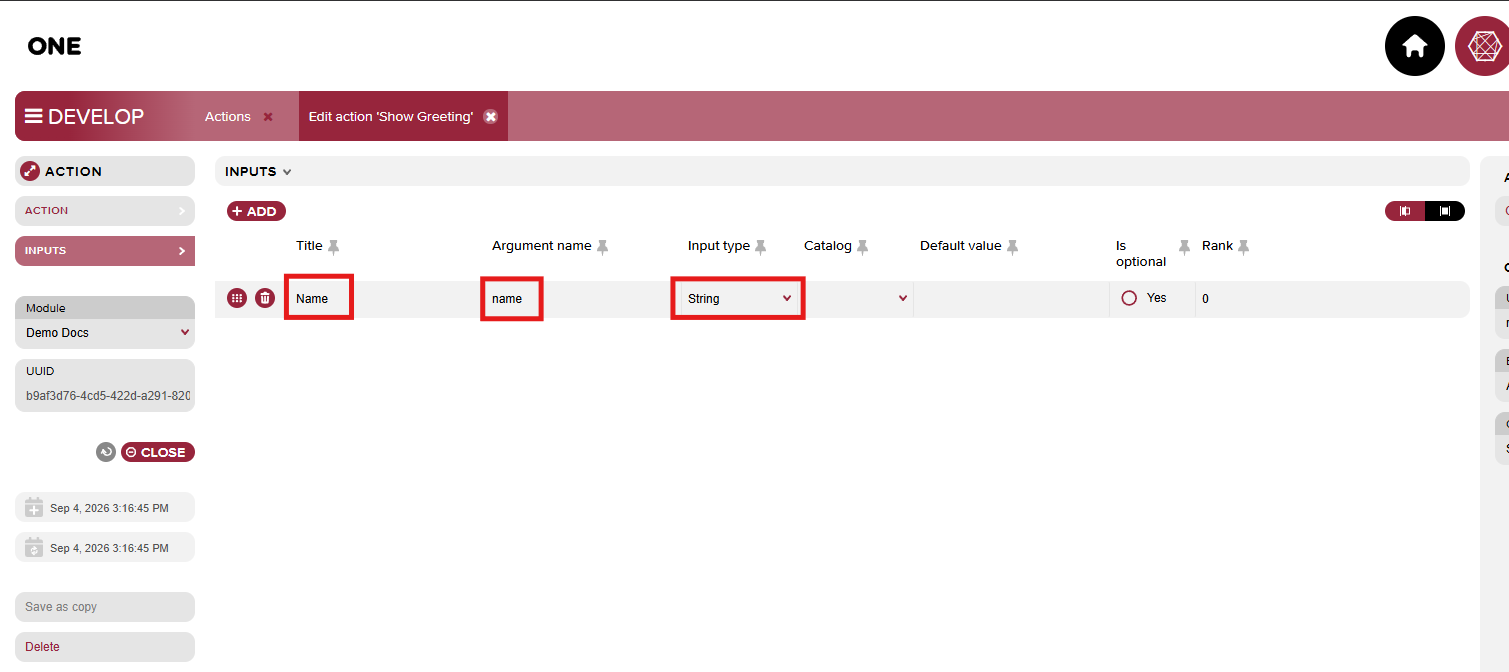
name, so the associated workflow must declare a parameter named name in its main method. For this String input, the corresponding parameter is name as string.Create the workflow
Create a workflow named ActionShowGreeting and add this code:
workflow ActionShowGreeting;

method atomic main(name as string) {
    validation->fail("Hello, " + name);
}
validation->fail only to make the value received by the workflow immediately visible. The method raises a validation error and stops execution, so use an appropriate success response for production workflows.Link the workflow
Return to the Show Greeting Action. In the ACTION tab, set Workflow to ActionShowGreeting, then save the Action.
Add the Action to a search view
Navigate to Develop ➔ Search views and edit the search view where the Action should appear. Open its ACTIONS tab, add Show Greeting, and save the search view.
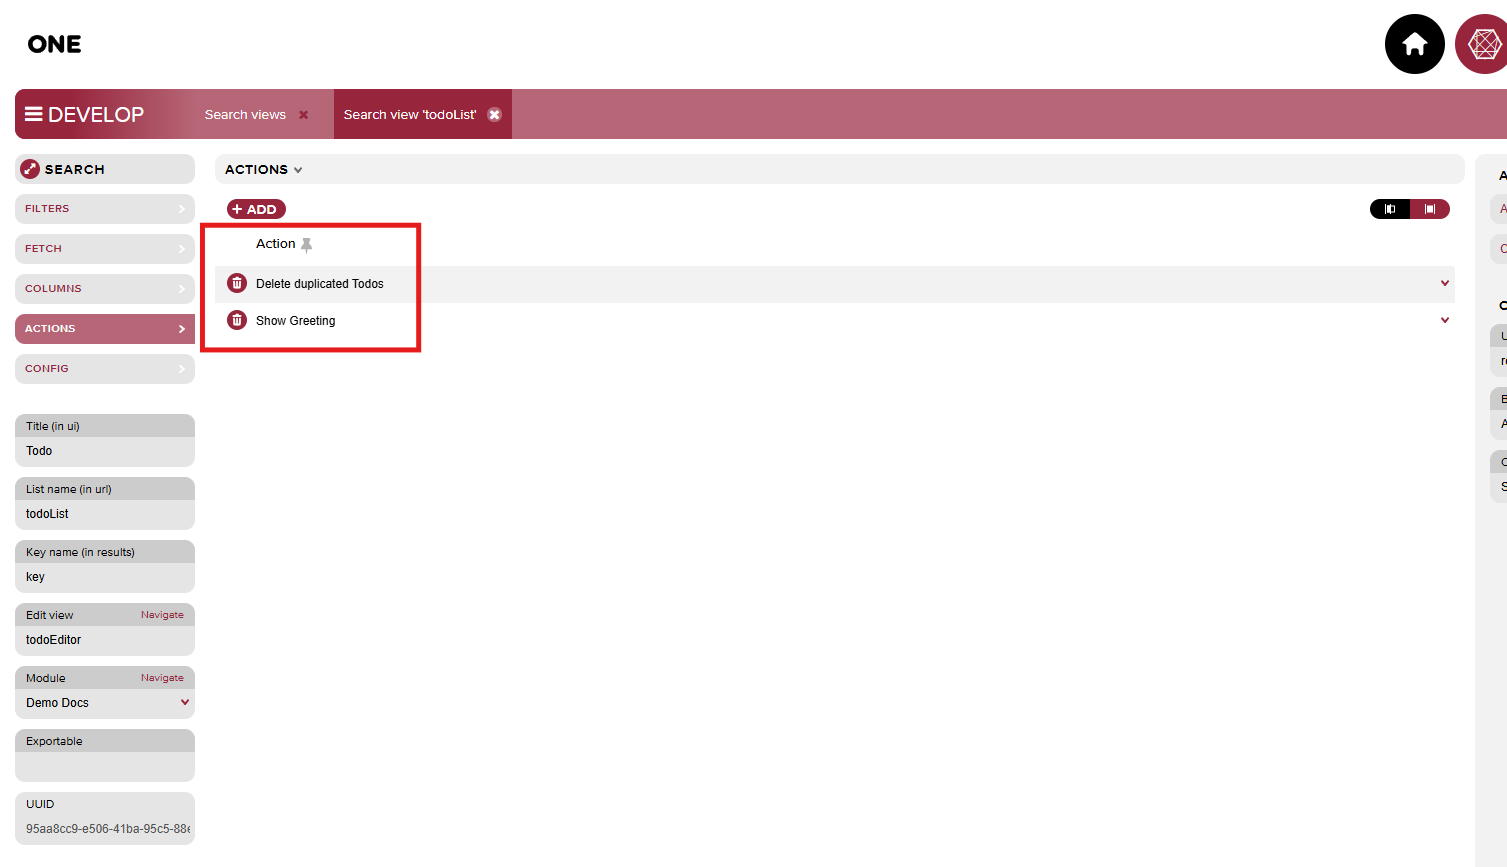
Run the Action
Open the configured search view. Show Greeting now appears in its ACTIONS panel.
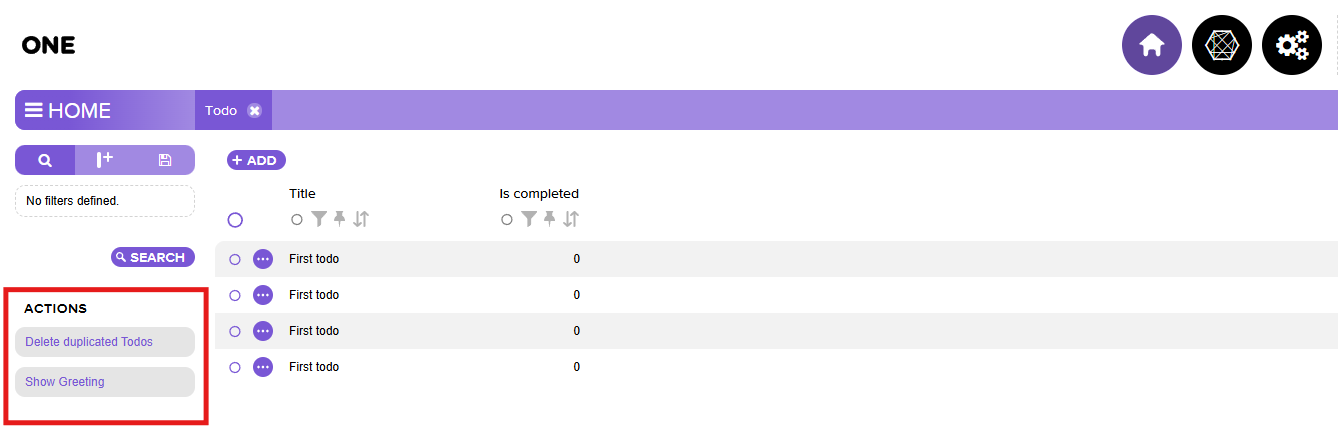
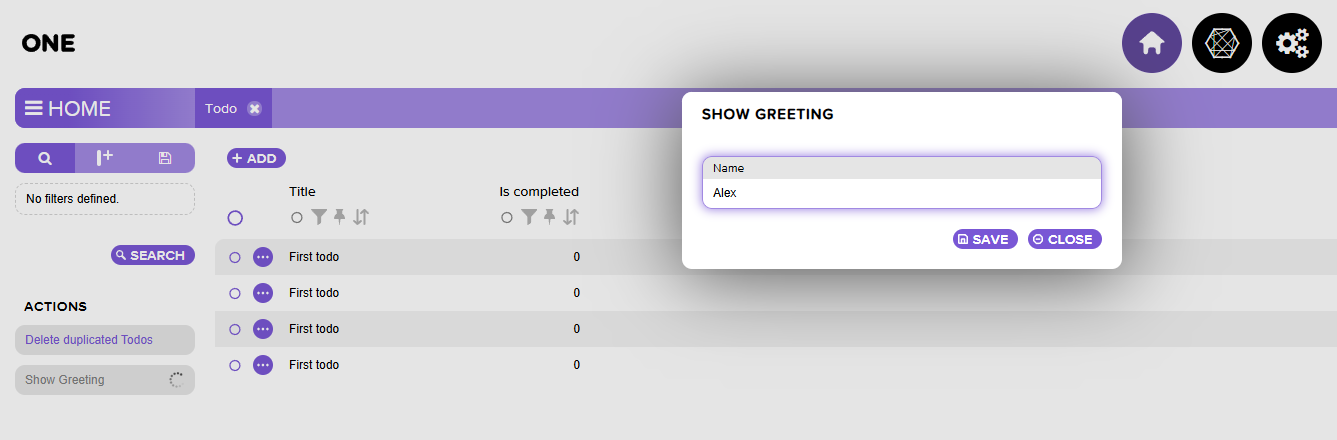
Click Show Greeting, enter Alex in the Name field, and click Save to run the Action.
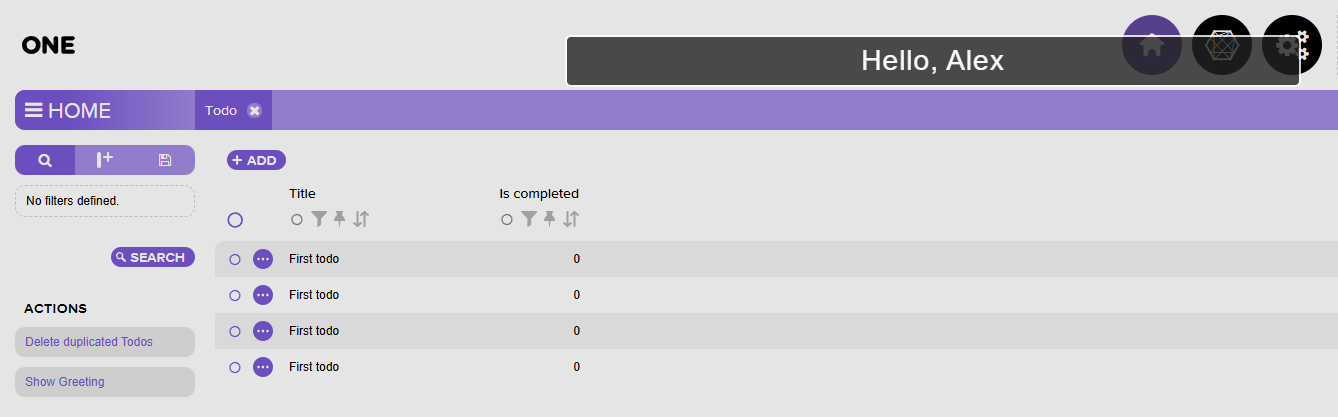
The workflow receives Alex through the name parameter and displays the validation message Hello, Alex.
How-to guides
Create an Action
- Navigate to Develop ➔ Actions.
- Click Add and enter the user-facing Name.
- Select a Module when the Action belongs to one.
- Select an existing Workflow, or use the navigation button to create one.
- Add any values that the workflow needs in the INPUTS tab.
- Save the Action.
- Add it to the ACTIONS tab of the required search view, or reference it from a home view.
- Open the target view and test the Action with representative input values.
Update an Action
- Navigate to Develop ➔ Actions and select the Action.
- Update its name, module, workflow, or inputs.
- If an Argument Name or Input type changed, update the corresponding
mainmethod parameter in the workflow. - Save both the workflow and the Action.
- Run the Action from every view where it is used and verify its inputs and result.
Add inputs to an Action
Open the Action's INPUTS tab and add one row for each value that the workflow must receive. The order of the rows is controlled by Rank.
For every input, add a corresponding parameter to the associated workflow's main method. Use the input's Argument Name as the parameter name—for example, name becomes main(name as string)—and map its type as follows:
| Input type | Workflow type | Value represented |
|---|---|---|
String | string | Text |
Boolean | bool | true or false |
Integer | int | Whole number |
Decimal | decimal | Decimal number |
Date, Datetime | datetime | Selected date or date and time |
FixedList, DynamicList | int | ID of the entity selected from the catalog |
File | int | id_storage_file |
main method signature as one interface. Whenever you add, rename, remove, or change the type of an input, make the corresponding change to the workflow parameters.Use Catalog only for list-based input types. Use Default value to prefill an input and Is Optional to control whether the user must provide it.
Delete duplicate todos safely
The following Action removes duplicate todos owned by the user who runs it. Todos are grouped by title; within each group, the record with the lowest key is kept and the others are deleted.
Create an Action named Delete duplicated Todos, then add this input in the INPUTS tab:
| Field | Value |
|---|---|
| Title | Are you sure? |
| Argument Name | is_confirmed |
| Input type | Boolean |
| Catalog | Leave empty |
| Default value | Leave empty |
| Is Optional | No |
| Rank | 0 |
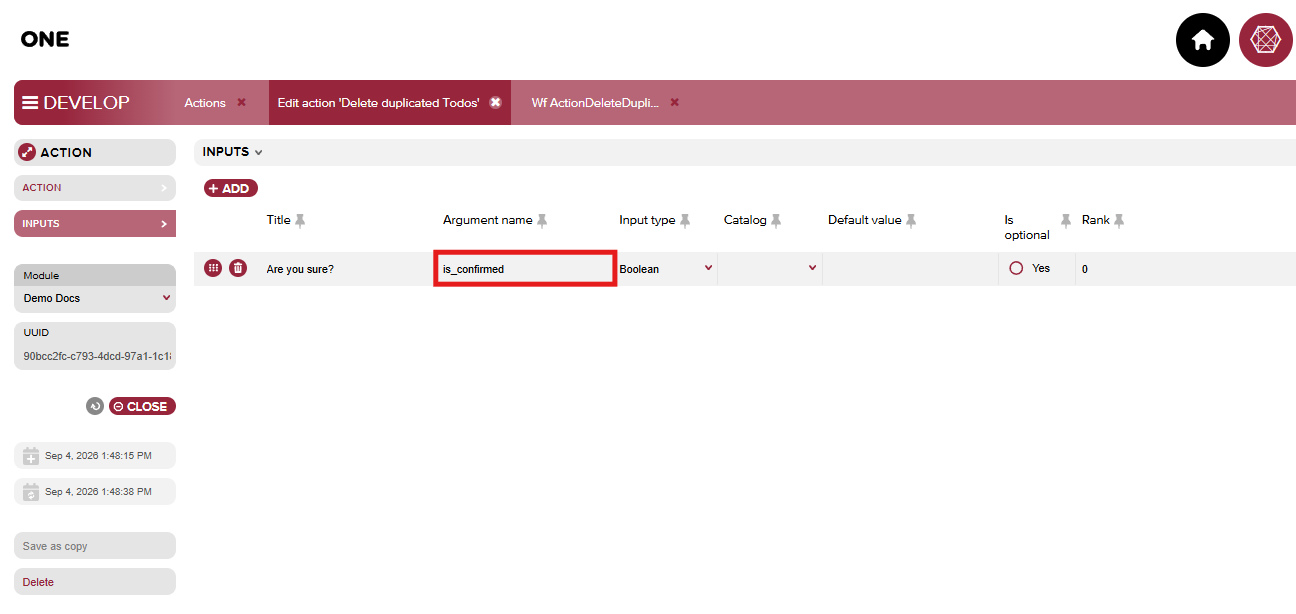
The value in Argument Name must also appear in the called method's parameters: is_confirmed in the Action configuration maps to main(is_confirmed as bool) in the workflow.
Create the ActionDeleteDuplicatedTodos workflow with the following code:
workflow ActionDeleteDuplicatedTodos;

method atomic main(is_confirmed as bool) {
    // Require confirmation before deleting any records.
    validation->failIf(is_confirmed != true, "You didn't confirm the deletion of duplicate todos");

    // Limit the operation to the user who called the Action.
    var currentUser = system->getCurrentUser();

    // Group the current user's todos by title.
    var allMyTodos =
        FETCH todo(title GROUP BY)
        FILTER AND (id_user == ${currentUser.key})
        **;

    foreach myTodo in allMyTodos {
        // Keep the todo with the lowest key in each title group.
        var remainingTodo =
            FETCH todo(key)
            FILTER AND (title == ${myTodo.title}, id_user == ${currentUser.key})
            ORDER BY key ASC
            LIMIT 1 **;

        // Find the other todos with the same title and owner.
        var duplicateTodos =
            FETCH todo(key)
            FILTER AND (
                title == ${myTodo.title},
                key != ${remainingTodo.key},
                id_user == ${currentUser.key}
            )
            **;

        foreach duplicateTodo in duplicateTodos {
            DELETE todo (duplicateTodo.key);
        }
    }
}
Select ActionDeleteDuplicateTodos in the Action's Workflow field, save the Action, and add it to the required search view.
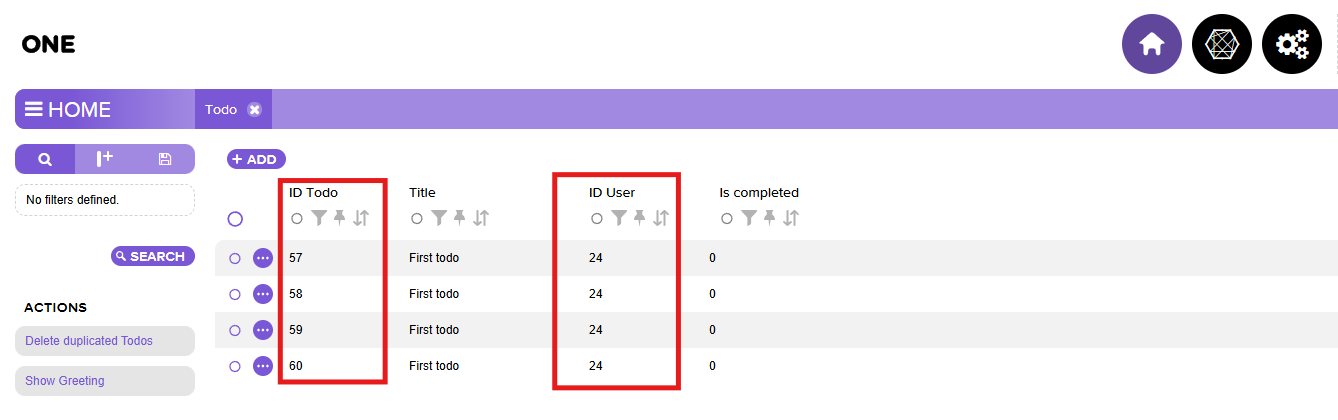
To verify the behavior, create at least two todos with the same title and note their keys and owner. In this example, todos 57 through 60 have the same title and belong to user 24.
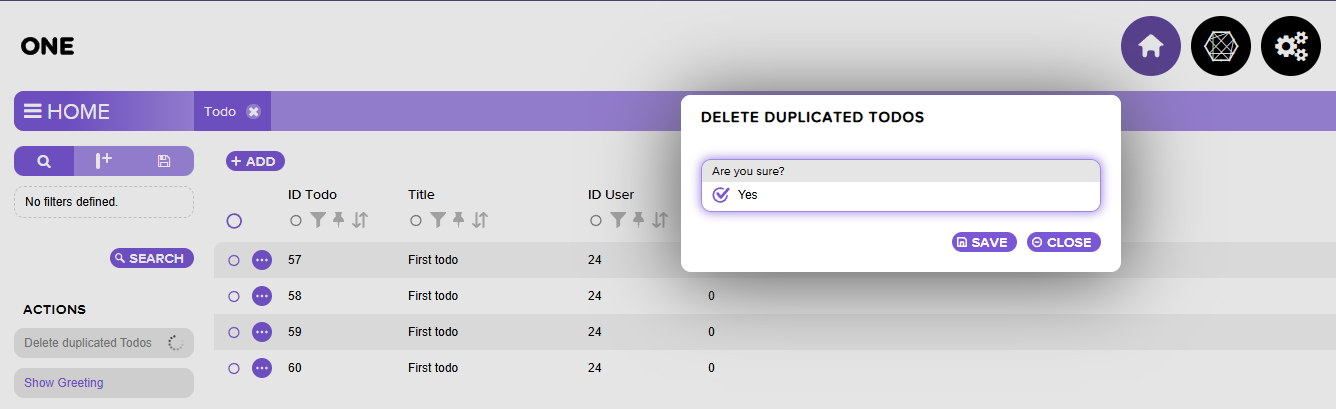
Run the Action without confirmation first and check that no records are deleted. Run it again, select Yes in the confirmation dialog, and click Save.
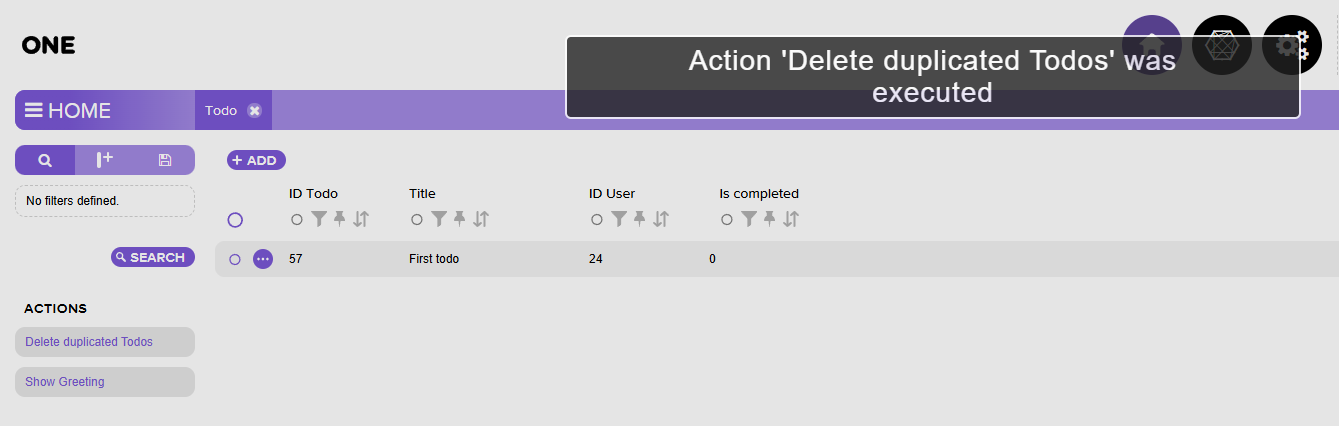
After the Action finishes, refresh the search view. Only the lowest-key todo in the group remains; in this example, that is todo 57.
Repeat the test with a unique todo and with a same-title todo owned by another user. Both records must remain unchanged.
Reference
Action Designer
General fields
| Field | Description |
|---|---|
| Module | The module that contains the Action. This field is optional. |
| UUID | The unique identifier of the Action record. This field is read-only. |
Entity diagram:
ACTION tab
| Field | Description |
|---|---|
| Name | The user-facing name displayed on the Action button. |
| Workflow | The workflow executed by the Action. Use the navigation button to create or edit it. |
INPUTS tab
Each row defines one value collected from the user and passed to the associated workflow.
| Field | Description |
|---|---|
| Title | The label displayed to the user. |
| Argument Name | The name of the corresponding parameter in the workflow's main method. |
| Input type | The UI input type. It must be compatible with the workflow parameter type. |
| Catalog | The source of choices for list-based input types. |
| Default value | The value initially displayed in the input. |
| Is Optional | Whether the user may run the Action without providing a value. |
| Rank | The display order of the input. |
Tab entity diagram: